ROUTINE 5 – HAGLUND / INSERTIONAL ACHILLES REHAB
(Posterior Heel Pain, Calf Capacity & Return-to-Running Support)
Required materials:
- foam mat
- elastic band / mini-band
- chair or bench
- wall / stable support
- medium-sized dumbbells or loaded backpack
- optional: small towel / heel wedge
- optional: low stepper platform
Block priority:
- Block A: pain modulation and safe Achilles activation.
- Block B: basic calf-Achilles strength.
- Block C: unilateral calf progression and Achilles tolerance.
- Block D: hip support and posterior-chain control.
If using this routine as separate blocks, prioritise Blocks B and C during the week. Use Block A when the heel is stiff, sensitive or reactive. Use Block D as complementary support.
How to use this routine:
- Approximate duration:
- Full routine: ~40-50 min.
- Split format: 8-15 min per block.
- Shortened option: Blocks A-C only (~25-30 min) when the heel is reactive or time is limited.
- Best scheduling options:
- After an easy run.
- On a non-running day.
- As 4 separate end-of-day blocks across the week.
- Avoid placing the most demanding calf blocks right before intervals, hill sessions, long runs or downhill-heavy trail runs.
- Split-block option:
- It is fine to distribute the 4 blocks across different days.
- Blocks B and C are the main Achilles-loading blocks.
- Block A can be repeated more often if the heel feels stiff or reactive.
- Block D is accessory hip/posterior-chain support.
- Avoid doing heavy or unilateral calf work on too many consecutive days if the next-morning response worsens.
- Pain and next-morning rule:
- 0-2/10 during the routine: good.
- 3/10: acceptable if symptoms are not worse the next morning.
- 4/10 or next-day worsening: reduce range, load or volume.
- If symptoms increase the next morning, regress to isometrics and band work for 24-48 h.
- Haglund / insertional Achilles rules:
- No heel drops below horizontal.
- No aggressive calf stretching.
- No deep dorsiflexion under load.
- Keep calf work on flat ground at first.
- Use a small towel or heel wedge if needed.
- Only use a step later if the heel never drops below horizontal.
- Progression logic:
- Add load before adding range.
- Progress from: double-leg isometric → double-leg calf raise → assisted single-leg calf raise → weighted single-leg calf raise.
- This is not a standard midportion Achilles eccentric protocol. The goal is progressive tendon loading while limiting compression at the Achilles insertion.
========================================
————————
BLOCK A – Pain modulation & safe Achilles loading
Alternating (1 / 2)
————————
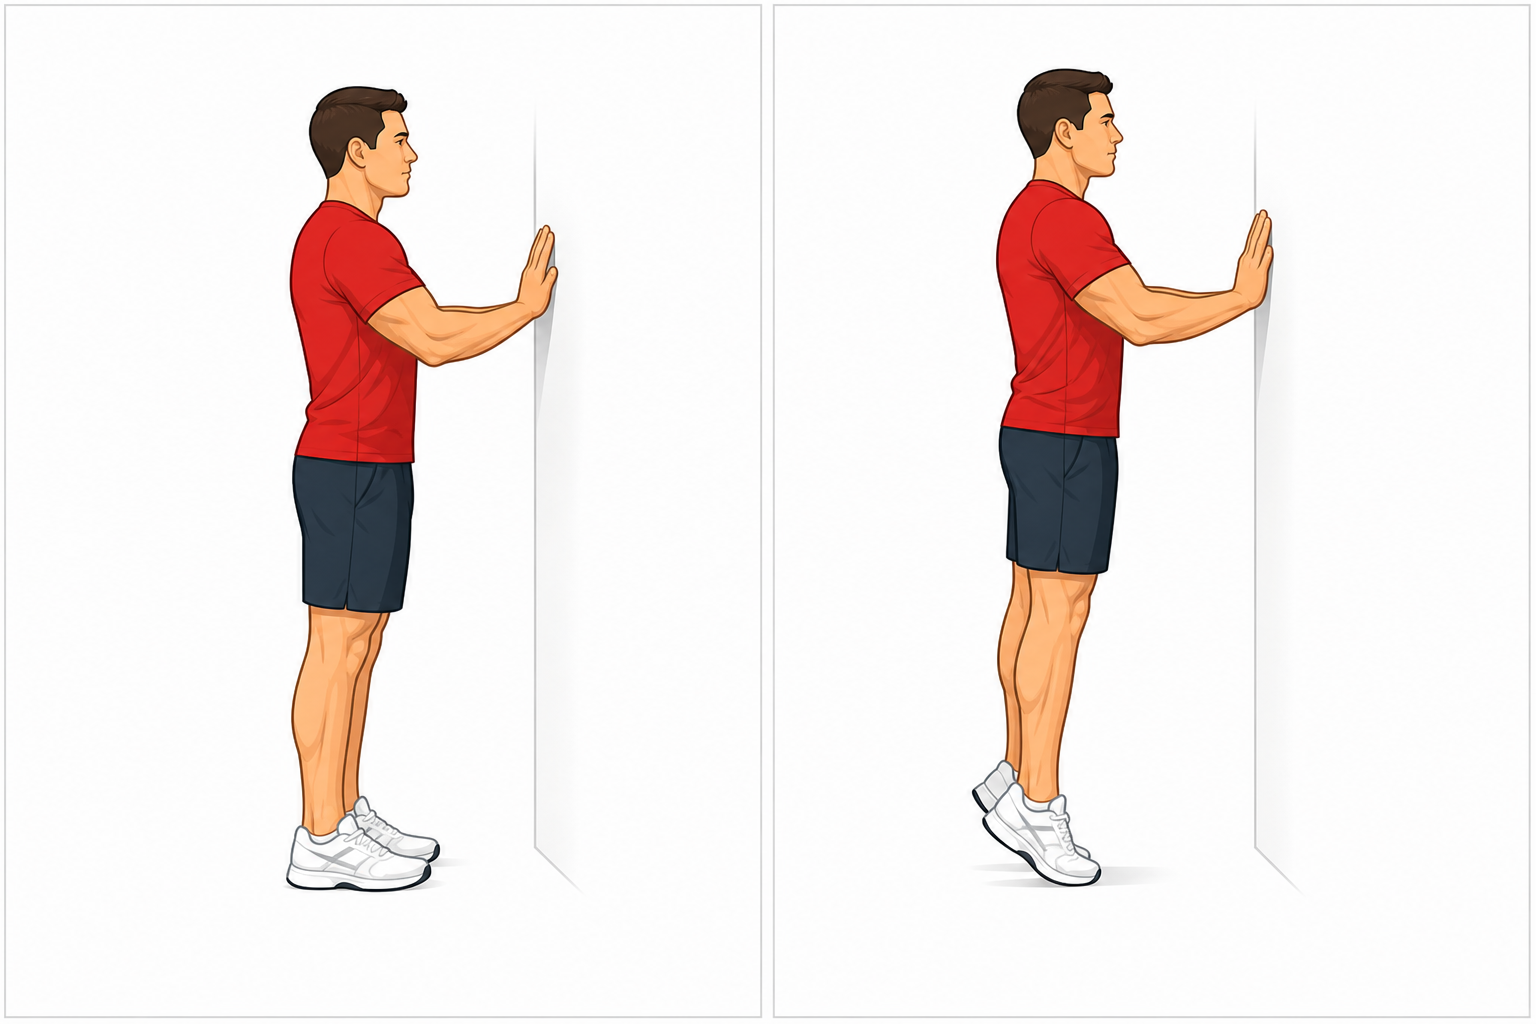
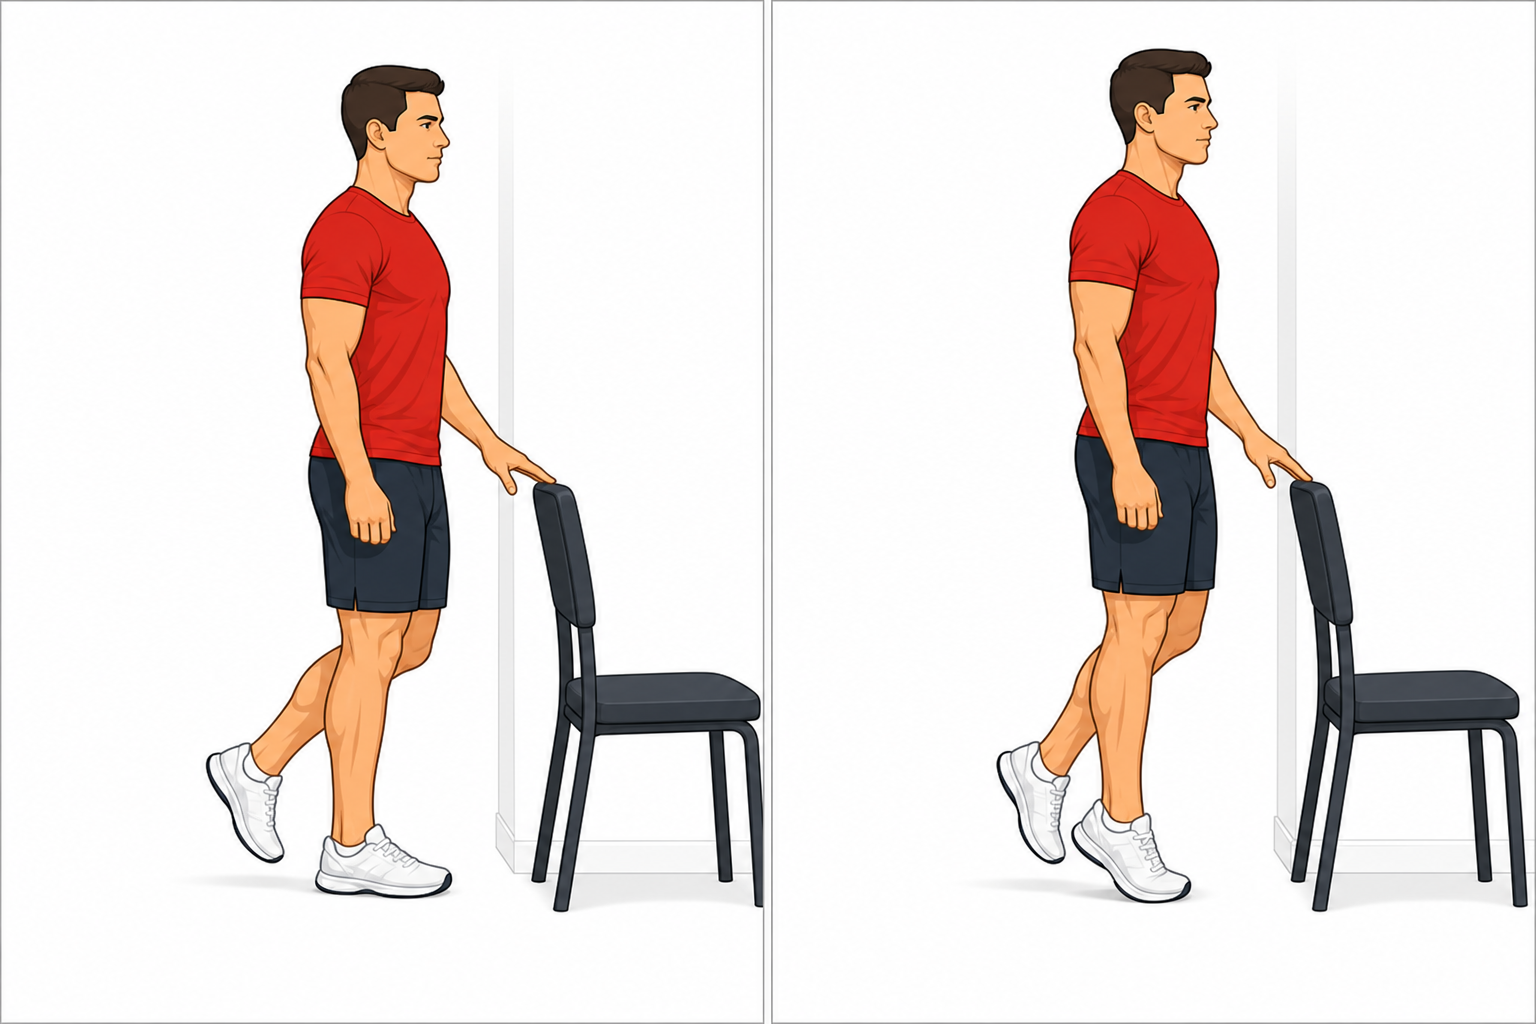
- Standing double-leg calf isometric (5 × 30-45 s)
[gastrocnemius, soleus, Achilles tendon, pain modulation]
→ LOAD: NO initially; optional later with dumbbells or backpack
→ TEMPO / DURATION: static hold, mid-to-high heel position
→ REST: 30-45 s between holds
Stand tall using a wall or stable support for balance. Rise onto both forefeet and hold a comfortable mid-to-high calf raise position without bouncing. Keep the knees mostly straight, weight evenly distributed through the big toe and second toe, and avoid letting the heels sink down.
Hold high, stay steady, no heel drop below neutral.
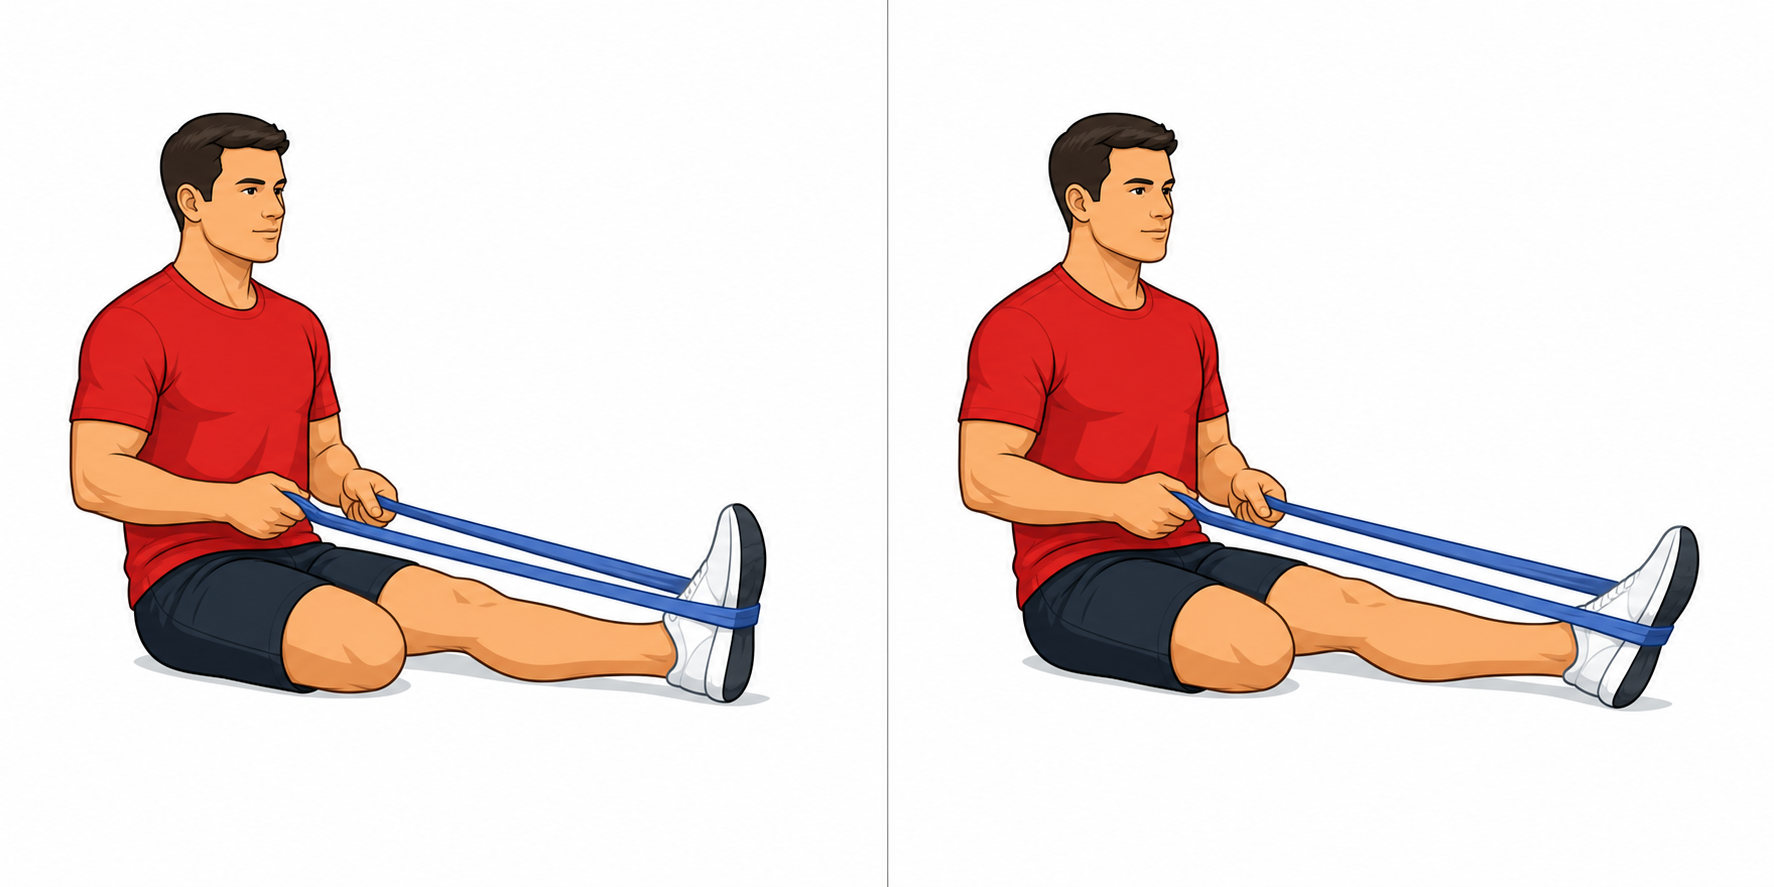
- Band plantarflexion (2 × 20/side)
[calf complex, Achilles tendon, ankle control]
→ LOAD: YES (elastic band); SAFE, EFFECTIVE ZONE: light–moderate resistance
→ TEMPO / DURATION: 2s push + 1s hold + 3s return (~6 s per rep)
→ REST: ~30-45 s between sides
Sit with one leg extended and loop the band around the forefoot. Push the forefoot away as if pressing a pedal, pause briefly, then return slowly under control. Keep the ankle moving straight, without rolling inward or outward.
Push smoothly, pause, return slowly.
→ REST: ~60 s between rounds
————————
BLOCK B – Calf strength without insertional compression
Alternating (3 / 4)
————————
- Double-leg calf raise on flat ground (3 × 12-15)
[gastrocnemius, soleus, Achilles tendon]
→ LOAD: OPTIONAL; SAFE, EFFECTIVE ZONE: bodyweight → light/moderate external load
→ TEMPO / DURATION: 2s up + 2s hold + 3s down (~7 s per rep)
Stand on flat ground with a wall or support nearby. Rise onto both forefeet as high as comfortable, hold briefly at the top, then lower slowly until the heels return to the floor. Do not drop below floor level and do not force a deep stretch at the bottom.
Rise high, hold, lower only to floor level.
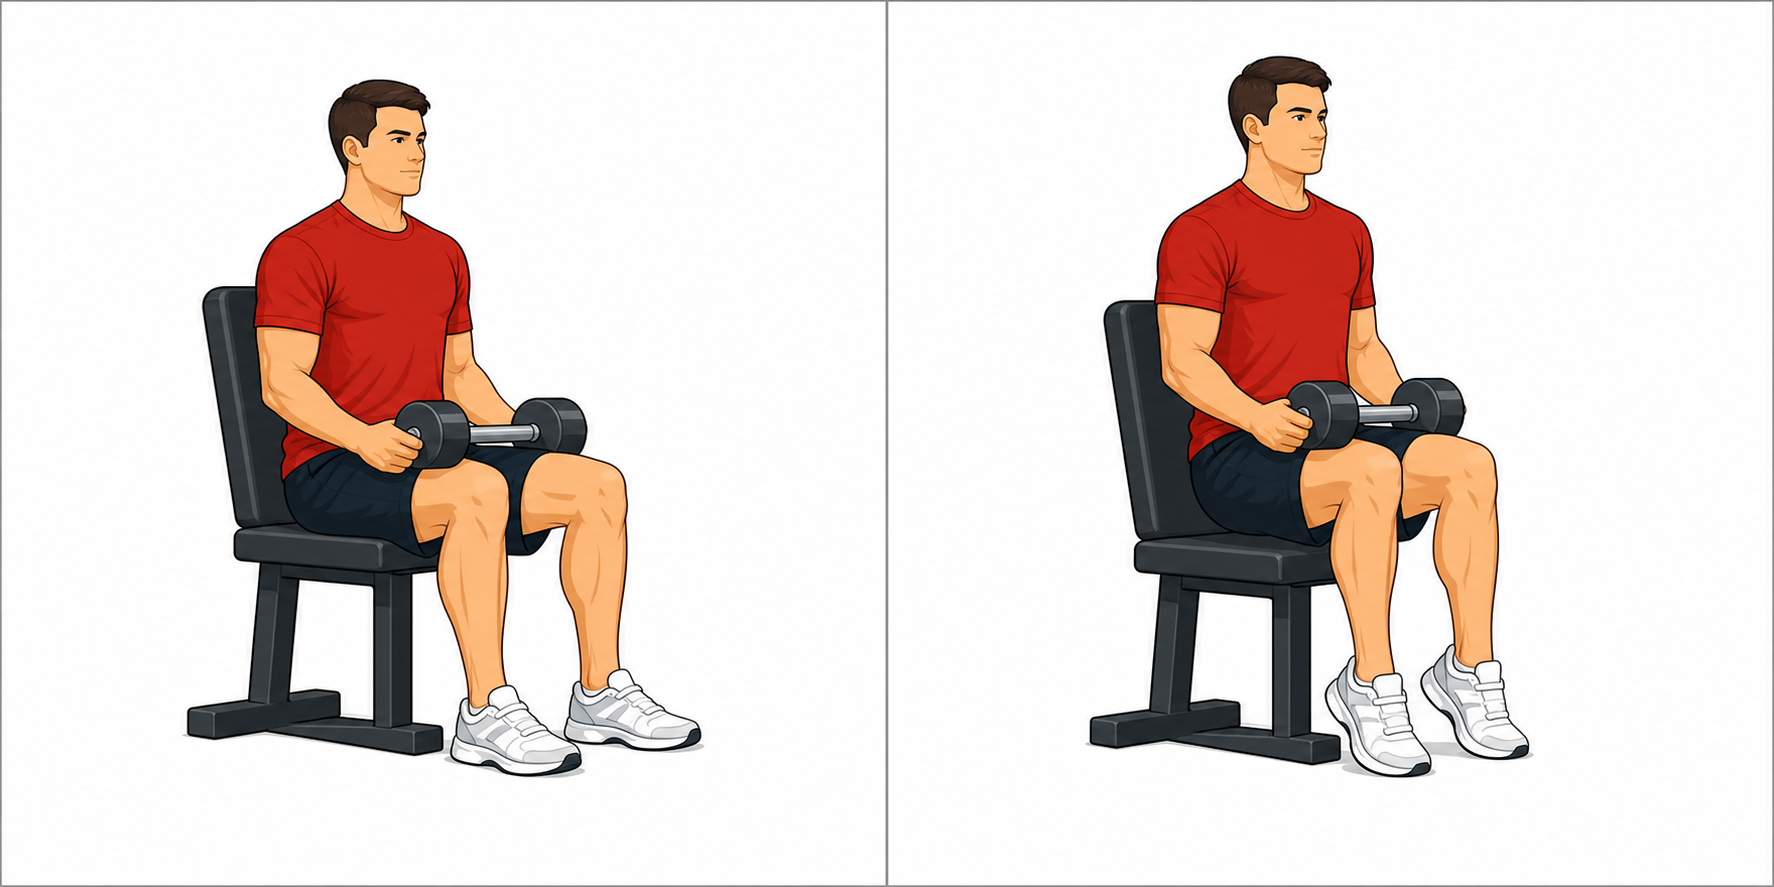
- Seated soleus raise with weight (3 × 12-15)
[soleus, Achilles tendon, ankle stabilizers]
→ LOAD: YES (dumbbell / backpack on knees); SAFE, EFFECTIVE ZONE: moderate load, slow tempo
→ TEMPO / DURATION: 2s up + 2s hold + 3s down (~7 s per rep)
Sit on a chair or bench with knees bent around 90°. Place a dumbbell or loaded backpack securely over the thighs near the knees. Raise the heels slowly, hold at the top, then lower under control only until the heels return to the floor or to the starting position.
Knees bent, lift heels, slow controlled lowering.
→ REST: ~45 s between exercises, 90 s between rounds
————————
BLOCK C – Unilateral calf progression & control
Alternating (5 / 6)
————————
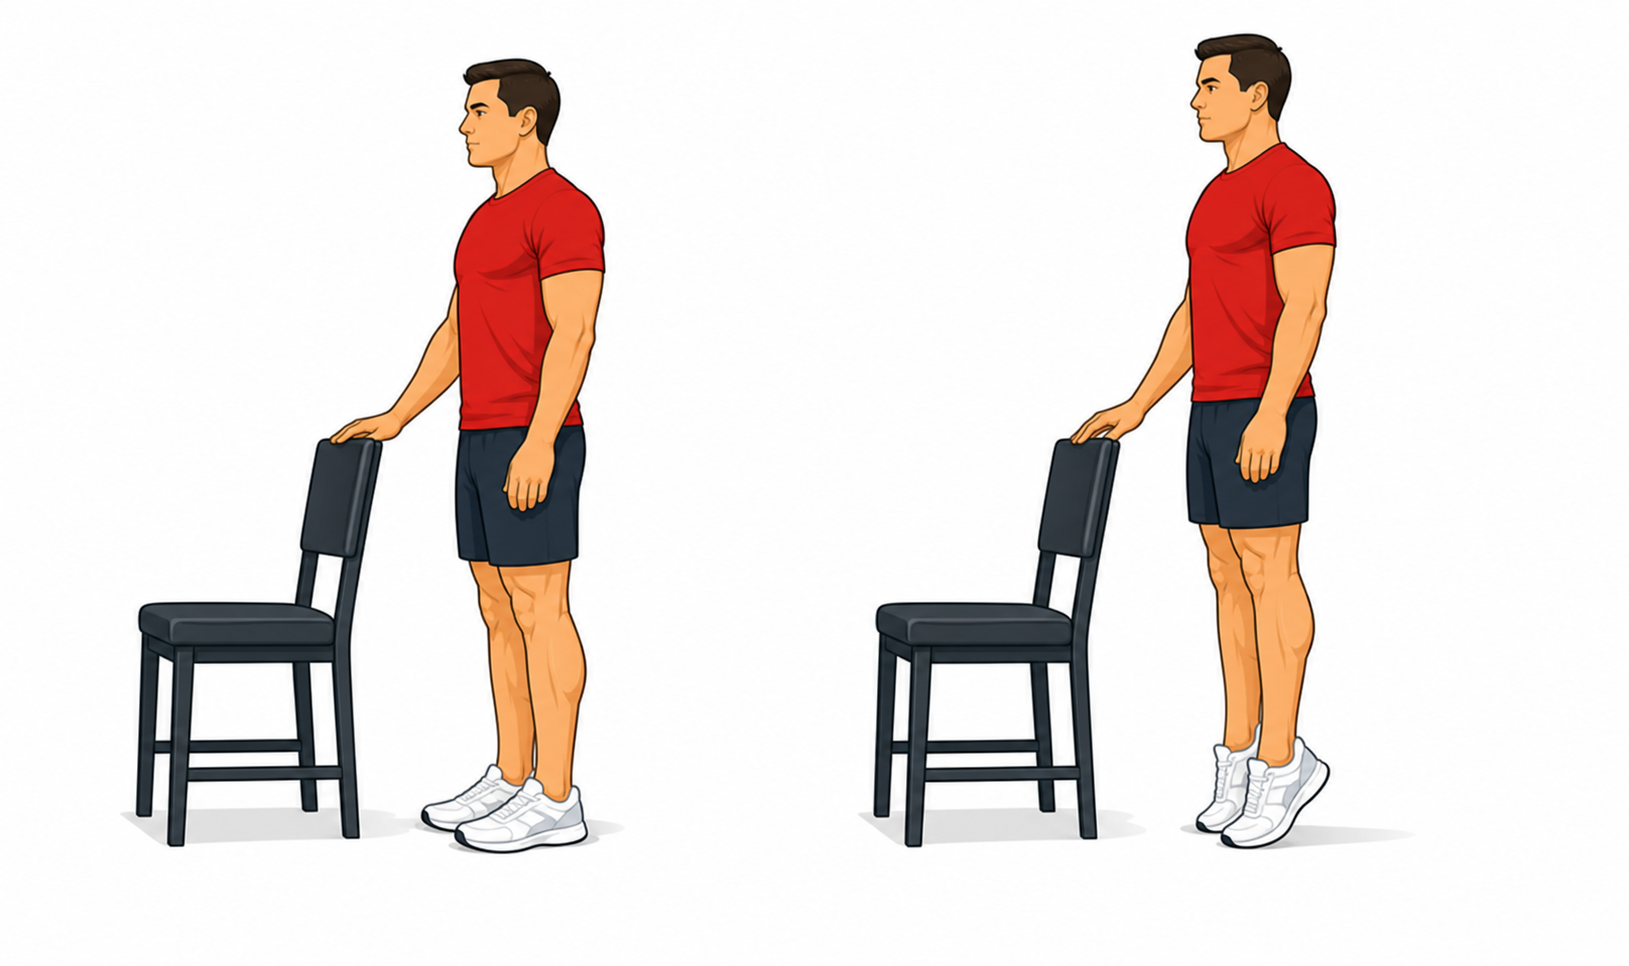
- Single-leg calf isometric, assisted (4 × 20-40 s/side)
[gastrocnemius, soleus, Achilles tendon, pain modulation]
→ LOAD: NO initially; optional later with light external load
→ DURATION: 30-45 s static hold in a mid-to-high heel position
→ REST: 30-45 s between holds
Stand on one leg with light support from a wall or chair. Rise into a comfortable calf raise and hold. Keep the pelvis level, knee stable and foot tripod active. If the affected side is too sensitive, use the other foot lightly on the floor to reduce load.
Hold steady, unload with the other foot if needed.
- Single-leg calf raise on flat ground, assisted (3 × 8-12/side)
[gastrocnemius, soleus, Achilles tendon, balance]
→ LOAD: OPTIONAL; SAFE, EFFECTIVE ZONE: bodyweight → light load
→ TEMPO / DURATION: 2s up + 2s hold + 3s down (~7 s per rep)
Stand on one leg using a wall or chair for balance. Rise onto the forefoot as high as comfortable, pause briefly, then lower slowly until the heel touches the floor. Keep the movement vertical and controlled, without dropping below neutral or pushing into a painful stretch.
One leg, controlled rise, lower only to floor.
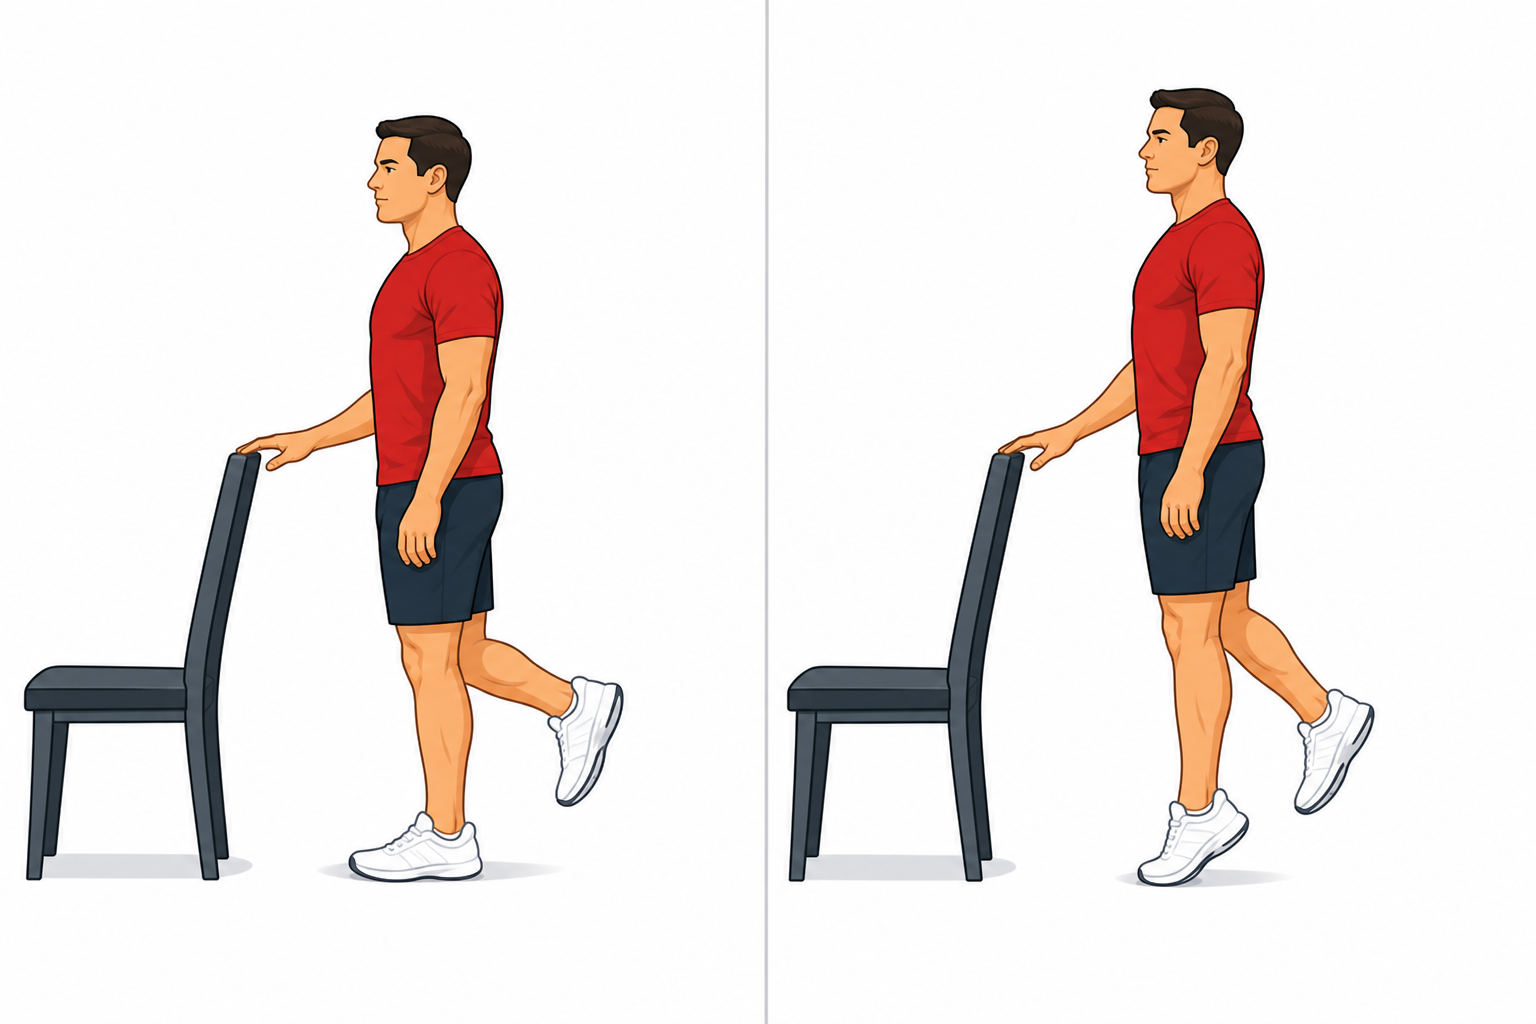
Progression: when 3 × 12/side is easy and there is no next-day reaction, add a dumbbell or loaded backpack, keeping the movement on flat ground and never dropping the heel below neutral.
→ REST: ~60-90 s between rounds
————————
BLOCK D – Hip support & posterior-chain control
Alternating (7 / 8)
————————
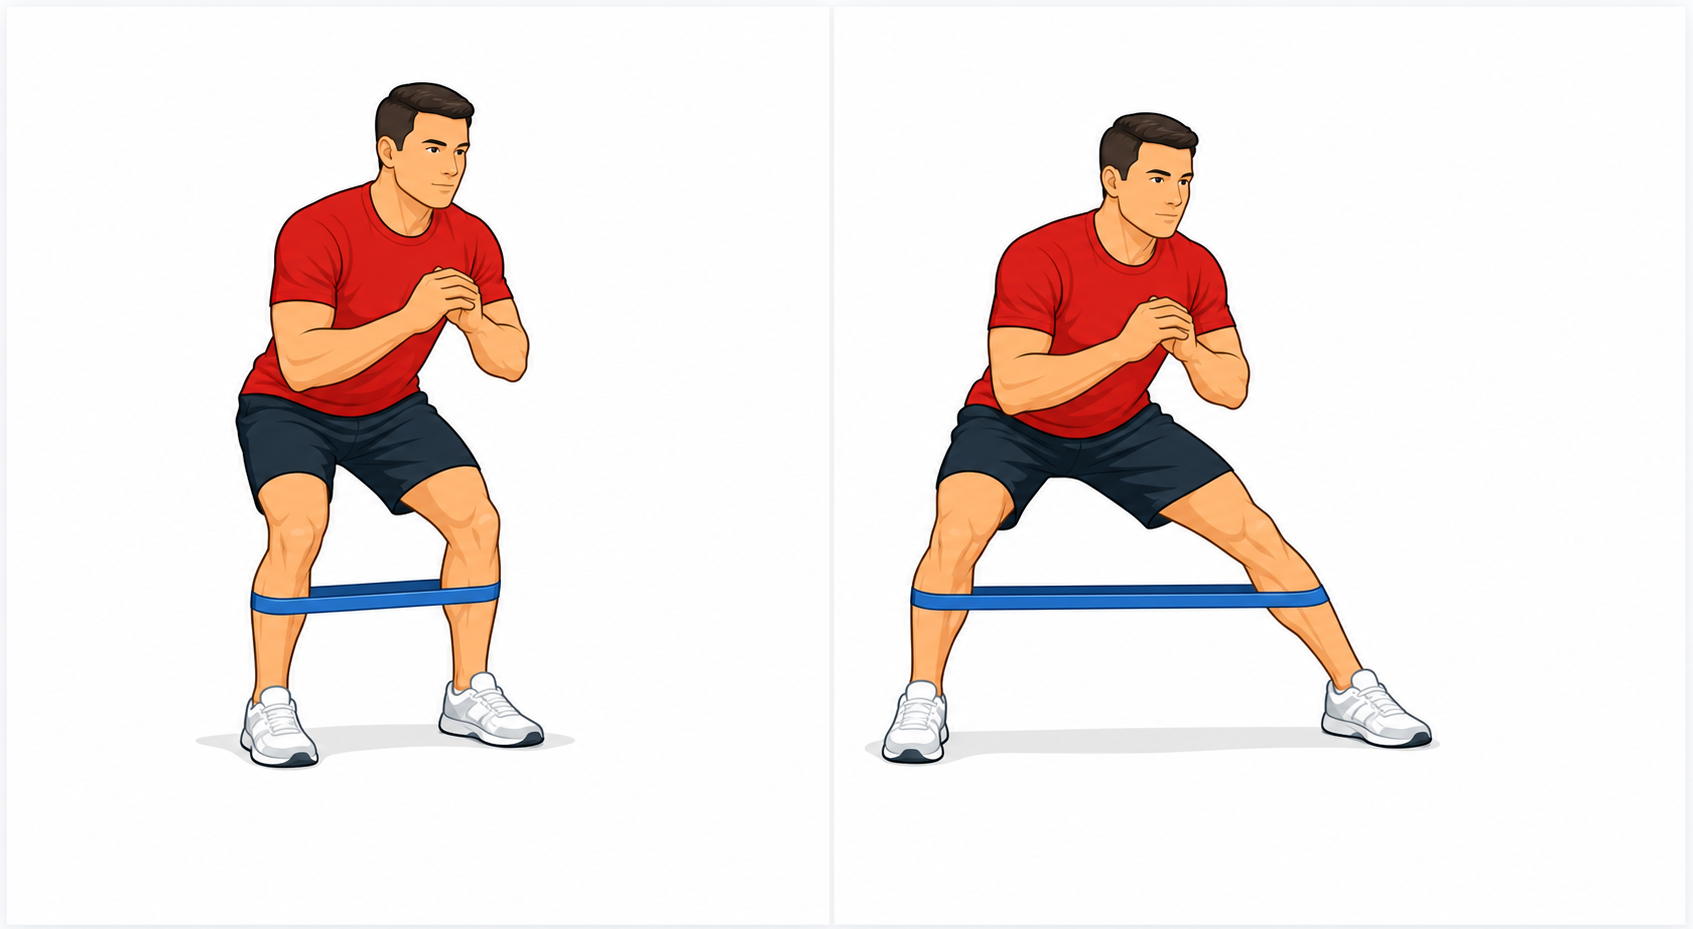
- Lateral band walks / monster walks (3 × 12 steps/side)
[glute medius, glute max, abductors, hip stability]
→ LOAD: YES (mini-band); SAFE, EFFECTIVE ZONE: light–moderate band resistance
→ TEMPO / DURATION: 2s step + 1s settle (~3-4 s per step)
Place a mini-band above the knees or around the ankles. Hold a shallow athletic stance with hips slightly back and knees tracking over toes. Step laterally with control, keeping tension in the band and avoiding knee collapse. Repeat both directions.
Small controlled steps, knees out, pelvis level.
- Glute bridge isometric (3 × 30-45 s)
Week A only
[glutes, hamstrings, pelvic stability]
→ LOAD: OPTIONAL (dumbbell / plate on hips); SAFE, EFFECTIVE ZONE: bodyweight → moderate load
→ DURATION: 30-45 s static hold
→ REST: ~45-60 s between rounds
Lie on your back with knees bent and feet flat. Lift the hips until shoulders, hips, and knees form a straight line, then hold for 30-45 seconds while keeping ribs down, pelvis level, and glutes active throughout.
Drive through heels, squeeze glutes, avoid lumbar arch.
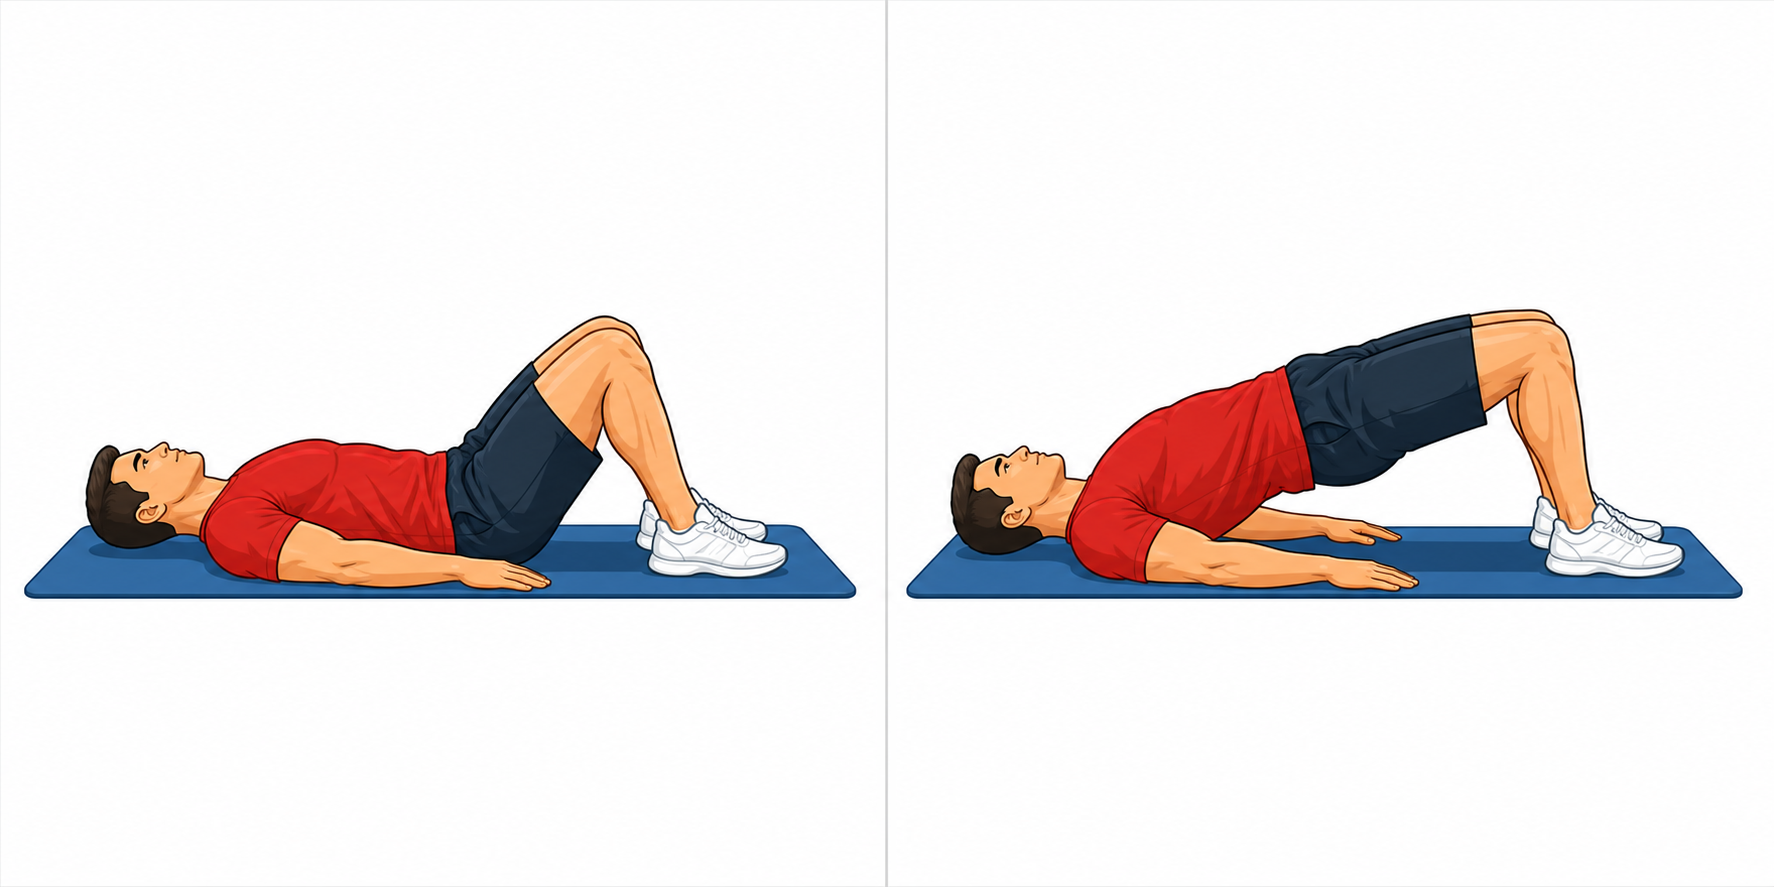
- Glute bridge dynamic (3 × 10-12)
Week B only
[glutes, hamstrings, pelvic stability]
→ LOAD: OPTIONAL (dumbbell / plate on hips); SAFE, EFFECTIVE ZONE: bodyweight → moderate load
→ TEMPO / DURATION: 2s up + 2s hold + 3s down (~7 s per rep)
→ REST: ~45-60 s between rounds
Lie on your back with knees bent and feet flat. Lift the hips until shoulders, hips, and knees form a straight line, pause briefly at the top, then lower slowly with control before repeating.
Controlled reps. Drive through heels, squeeze glutes, avoid lumbar arch.